 So, Summer 2015 was well and truly over, the biking season had come to an abrupt end, and the miserable dark months of Winter were looming.
How was I going to cope without my biking fix ?
Having built a Jawa 350 combo last year, and also owning a nice little CZ 180, I still had an interest in some other East European project.
My biker friend Victor had been drumming into me the the supreme qualities of the products born at Motorradwerk Zschopau.

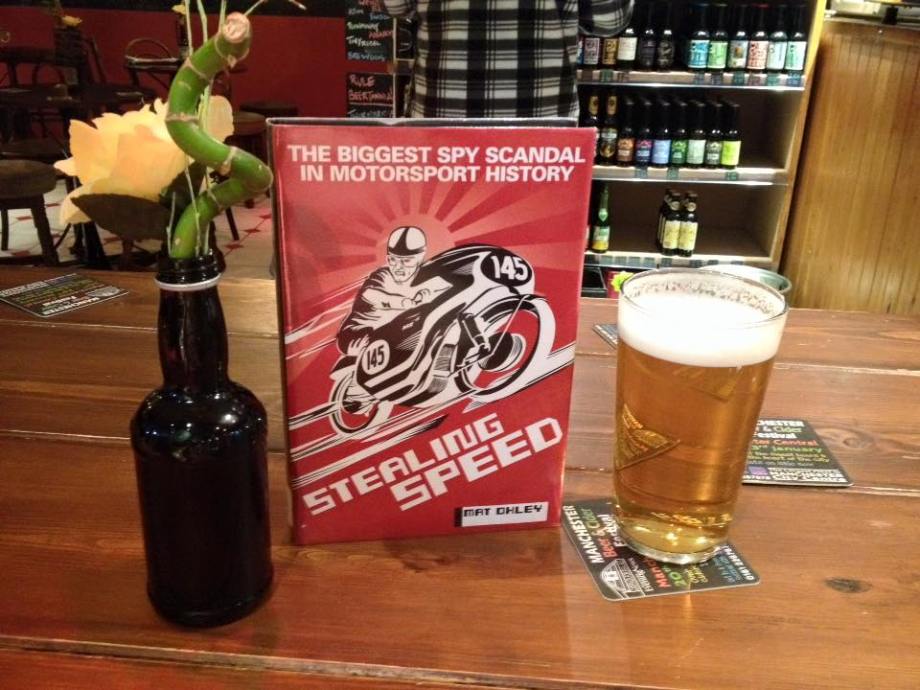
The Zschopau works was one of the oldest motorcycle factories in the world, producing motorcycles since 1922. They were the first company to develop the two-stroke engine for vehicles and were the leader in two-stroke development worldwide. Rasmussen had begun the motorcycle production under the brand name DKW. Later he also started the car company DKW cars. In the world economic crises of 1929, four local car manufacturers under the leadership of Rasmussen’s DKW founded Auto Union, nowadays known as Audi AG car manufacturer. The best known models from Zschopau later were the two-stroke 125/150 and 250 series, with the variants ES, ETS, TS and ETZ. In the 1950s, MZ was the world leader in two-stroke engines. Especially through the work of their racing engineer and department leader Walter Kaaden their engines became nearly unbeatable and in 1961 they nearly won the world championships in the 125 cc class against Soichiro Honda‘s four-stroke engines. The championship was lost through one of the biggest spy scandals in motorcycle history. The factory rider Ernst Degner fled from East Germany and brought all their knowledge to Suzuki. Walter Kaaden‘s secret was stolen. He had developed the two-stroke exhaust pipe, known as expansion chamber. In 1962, with his stolen knowledge that he brought to Suzuki he won the first world title for the Japanese manufacturer. The British author Mat Oxley wrote a book about this scandal: Stealing Speed. Later MZ was one of the few producers that made motorcycles with sidecars, though prior to 1972 sidecars were manufactured by Stoye. A later version named the MuZ Voyager was an Austrian 500 cc, four-valve, rotax-equipped, retro-styled standard, custom-painted to match the model #562 sidecar made by Velorex of Czechoslovakia. However, a cease and desist order was issued in the early 1990s by Kawasaki, who owned the rights to that name, and MuZ subsequently renamed the motorcycle the Silverstar, and the sidecar-equipped version the Silverstar Gespann. Only after Hong Leong Group took over the lead of MZ Motorrad und Zweiradwerke GmbH the funding was secured to invest in the development of new engines and motorcycles. They developed with the German MZ engineers the models MZ 1000s and MZ RT 125 (with a four-stroke engine) and as a successor model to one of the most famous and copied motorcycle models in the world, the MZ RT125.
Motorradwerk Zschopau

>>>>>>>>>
Victor has had a weird and wonderful motorcycling past, including several of these machines, his latest being his MZ 250 “Stinky” the one off special, changing constantly. 🙂
So, could one of these bikes be the answer to my seasonal woes ? Even the Landlord of my local was noticing my Winter boredom ….

So….with this in mind, I decided to keep a look out for a suitable “shed” to “do up” during the long dark days of winter.
Trawling around on Facebook a few days later, this advert appeared ….

Dudley ? …..not that far, and seeing as some good friends of ours, Bonnie and Mick Lovelock, have a nice little Jack Russell called Dudley, it was a no brainer, and as cheap as chips, I had to have her 🙂
Trailer on the back, off we went, South down the motorway to collect …….
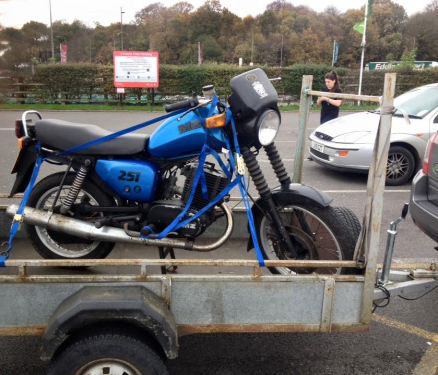
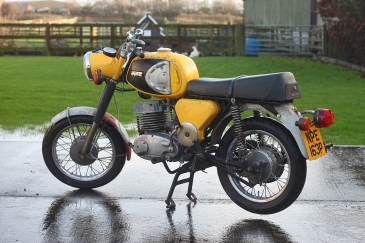
Deal done,(thanks Carl) collected, and stopped off at Keele services on the return leg for a photo shoot, (well Ian needed a pee) …… is that fuel tank really banana stylee ?
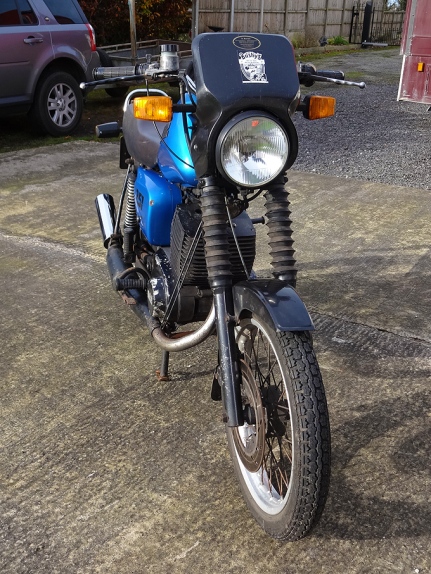
Up early next morning to face reality, it’s an ugly duckling indeed, just how Victor likes them, but I’m not so sure !!!
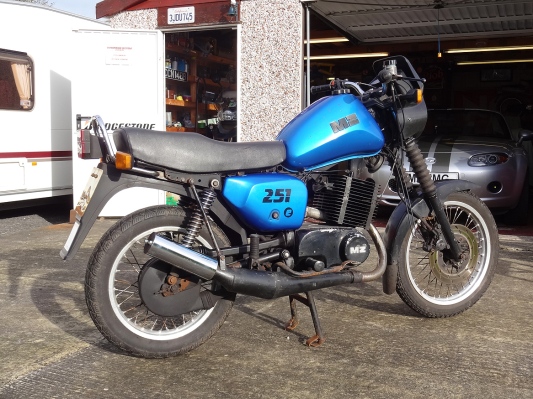
Well at least she’s got a Sportauspuff exhaust !!!
So…she’s all there and she runs well, but do I really want to be seen on a blue banana Communist commuter bike ? Will my other 8 bikes allow me to take this out and leave them behind ? No, I doubt it too…. so let’s look around and find some inspiration …….
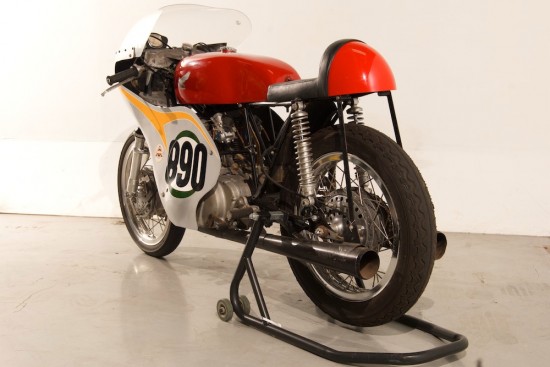
I’ve always fancied a “Cafe Racer” …. but could this be formed from such a lump ?
I found a little inspiration on Google …..

In my dreams I thought, but let’s have a go and see what happens …….
This whole project has been built entirely by me, all parts made, and work done by hand in my garden shed 🙂
>>>>>>>>
On the bench the next day, let dismantling commence ….. 12/11/2015


Ugliness abounds …..
Over the next few days I started to look at motorcycle / cafe racer design, and realise that some lines are not suitable, so changes must be made ….
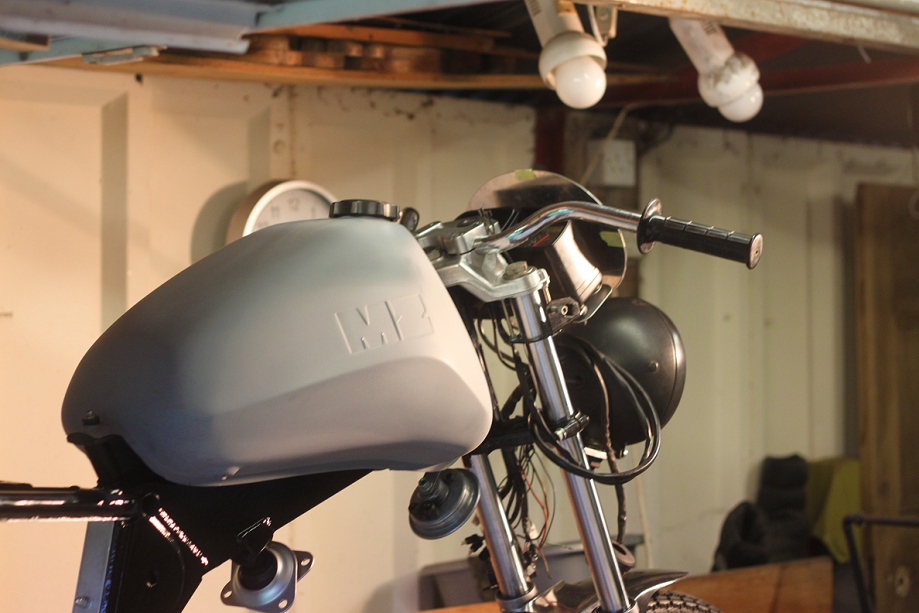
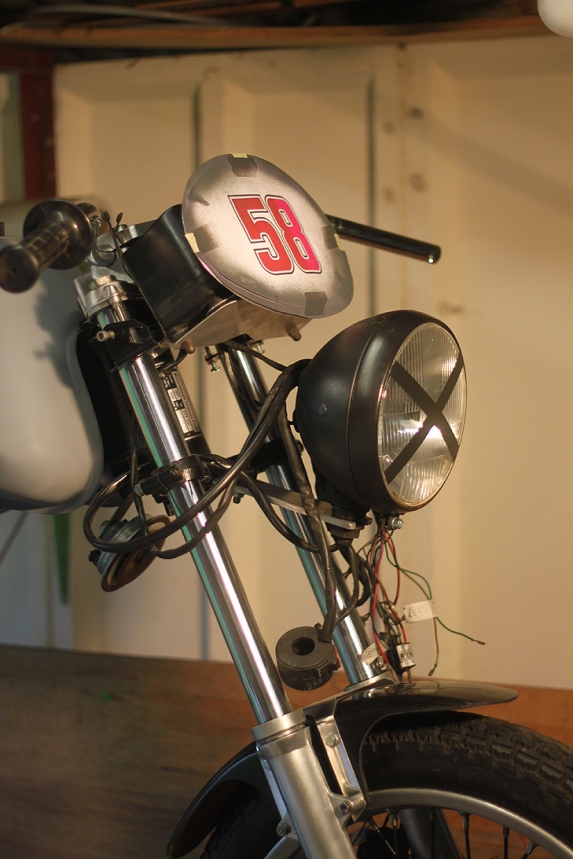
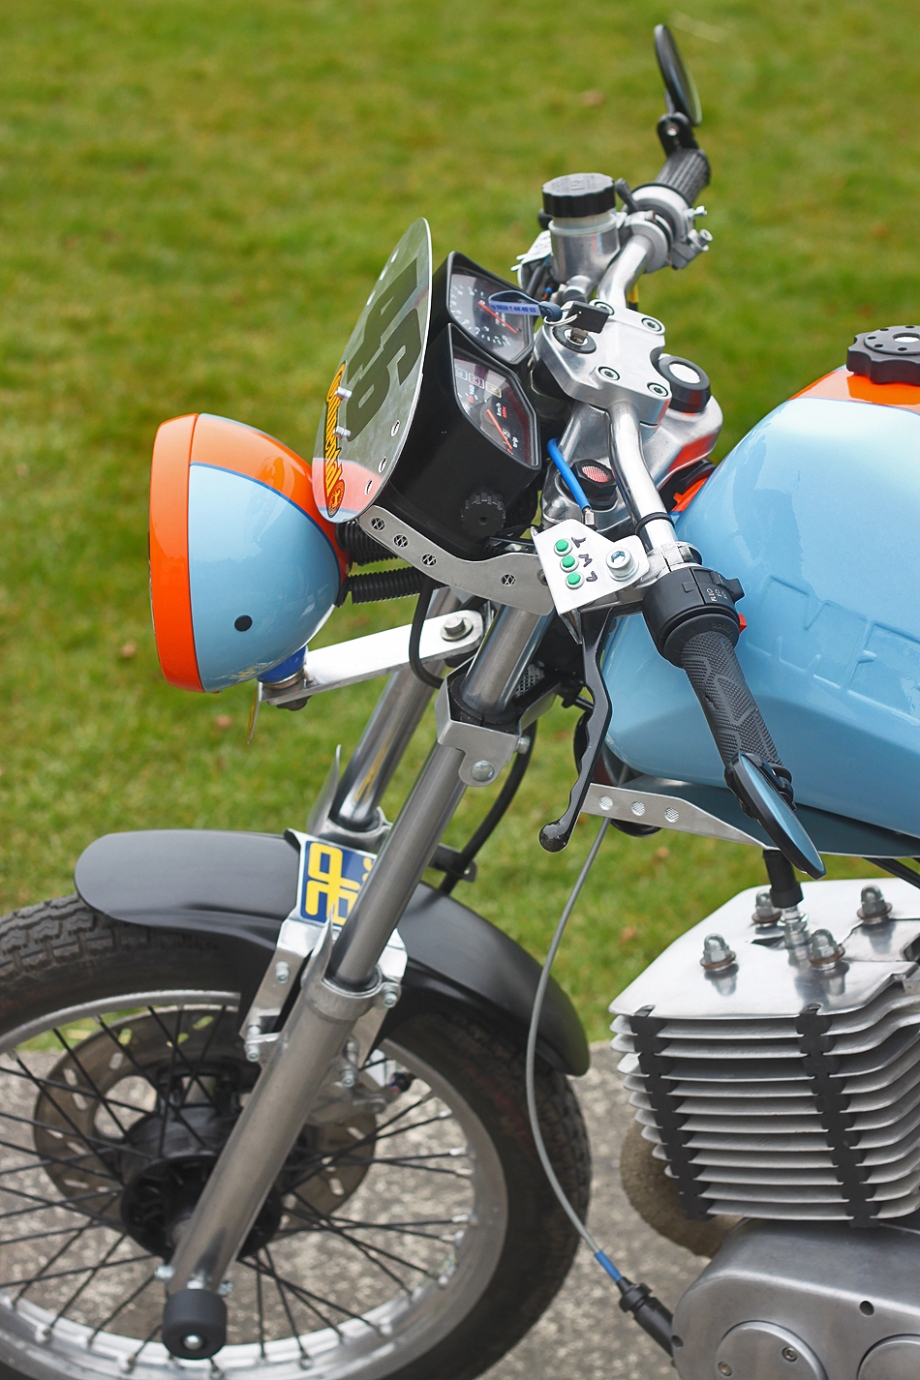
The fuel tank is at the wrong angle, and the headlamp is too high, these have to be in the correct design line to create the right look, so experiments began … the first step was to lower the headlamp by making a new lowered and extended mounting bracket ….

All mock up at this early stage. It’s all about angles 🙂


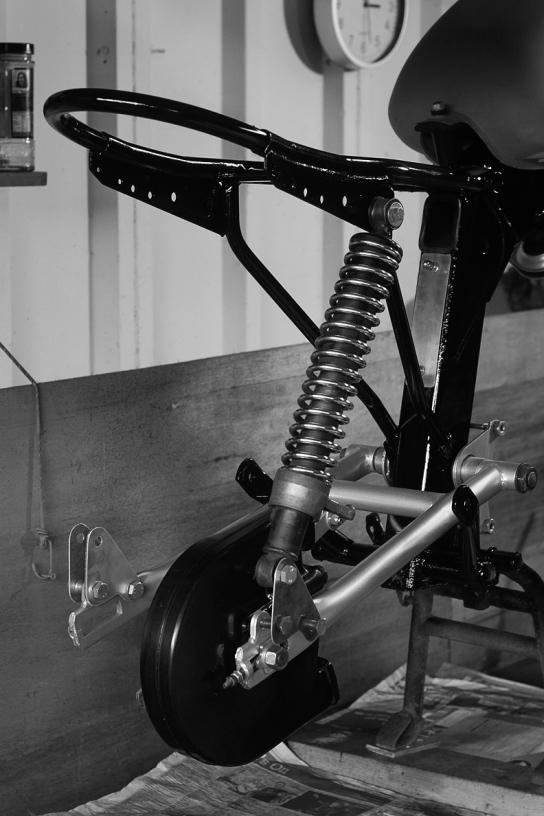
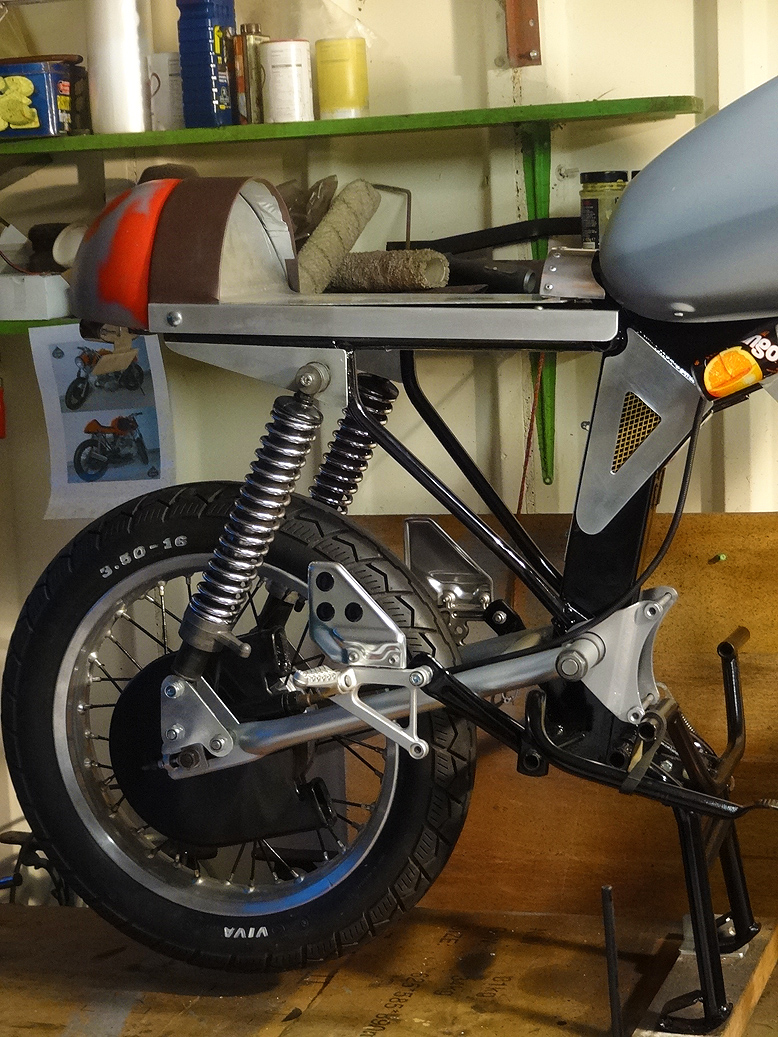
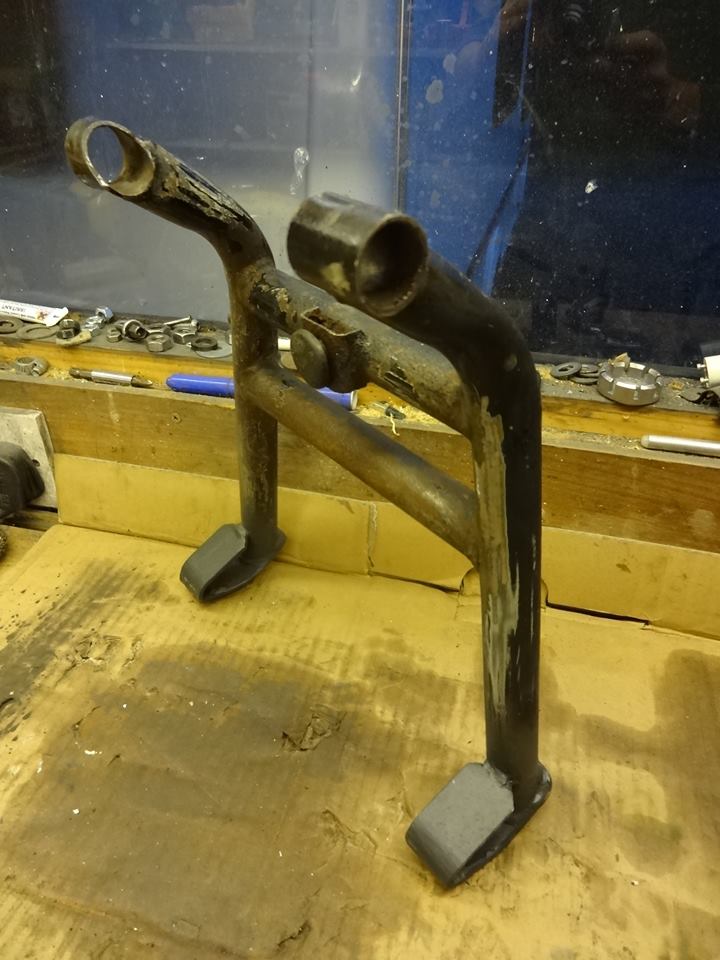
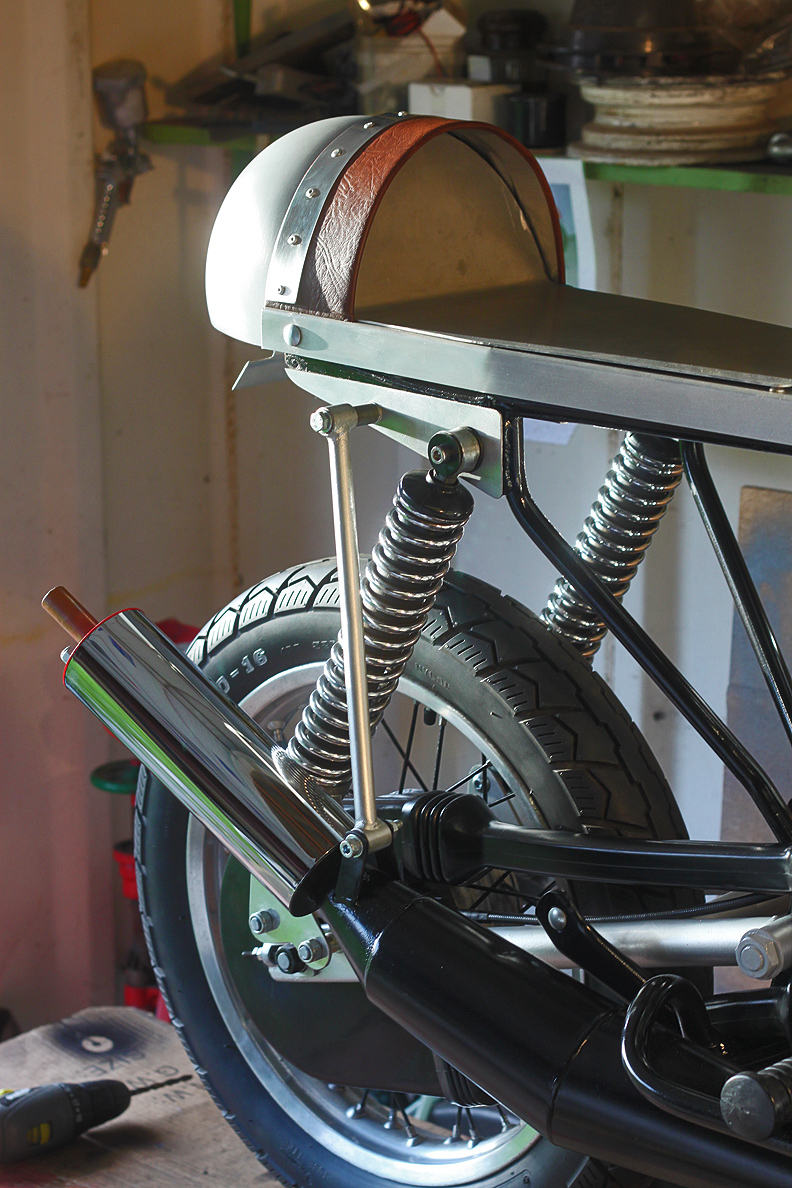
Once happy with the headlamp level, it was time to re-design the rear end ….. The seat height was far too low to create the straight through looks dictated by the design lines … so I went on to manufacture some brackets to raise the rear height by approx. 75mm

Now things were lining up, I raised the rear of the fuel tank, (by making a new mount), by appx. 50mm.

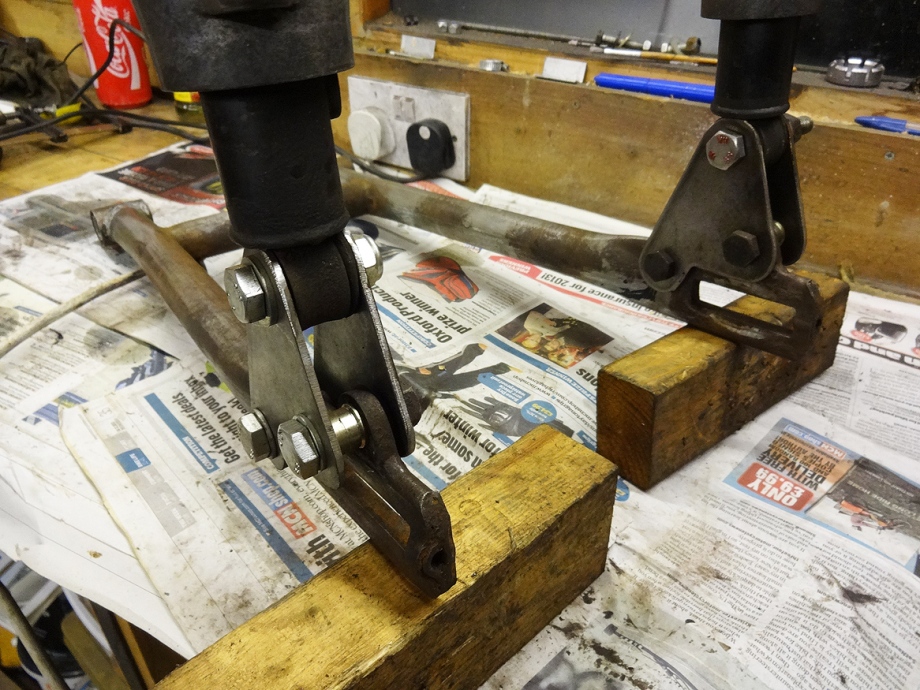
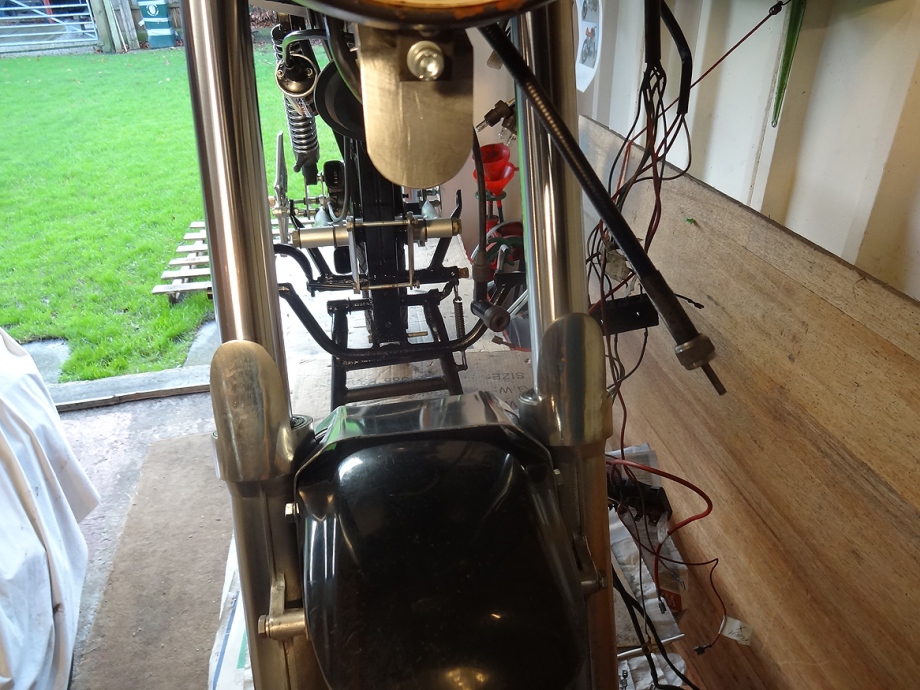
During this design stage, I had been busy re-building the rear end of the frame to match in with the front end lines …
I cut off the rear brackets and welded on new parts to the upper subframe and created a new rear loop on the frame.

Swing arm painted silver, loop in place, and fresh gloss on the frame, the rear end was starting to look the part.
While the bike was in pieces, refurbishment of all cycle parts was ongoing, all stripped back and re painted and polished.

With a little help here and there.. !!!

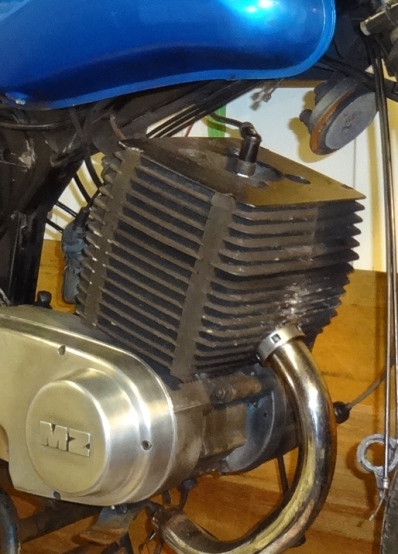
The engine was cleaned and stripped ……

…….only to find a small crack in the rear of the piston skirt. A replacement was ordered and fitted.

The engine was reassembled and then polished by hand ….
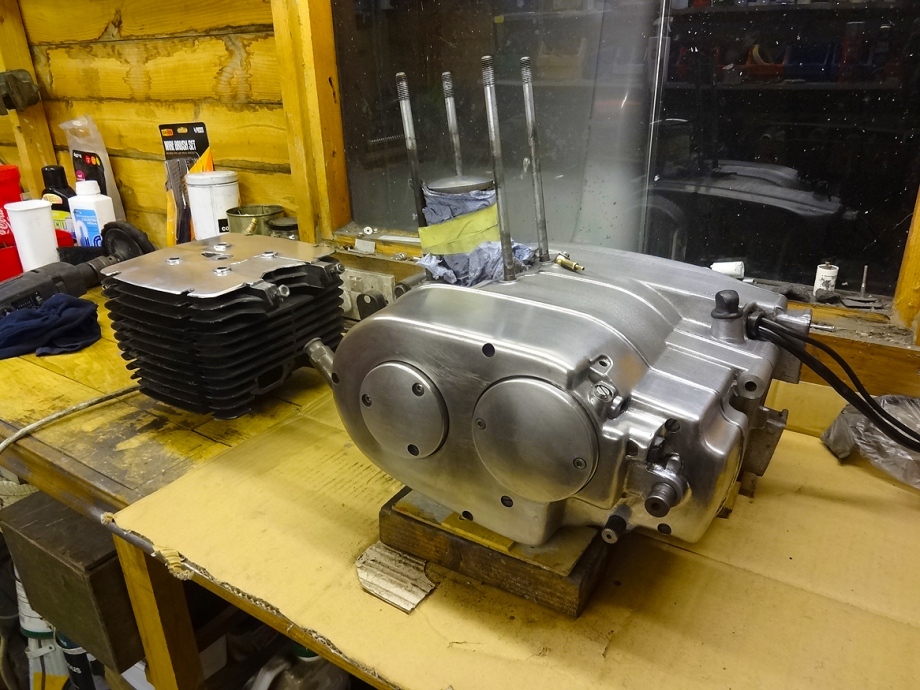
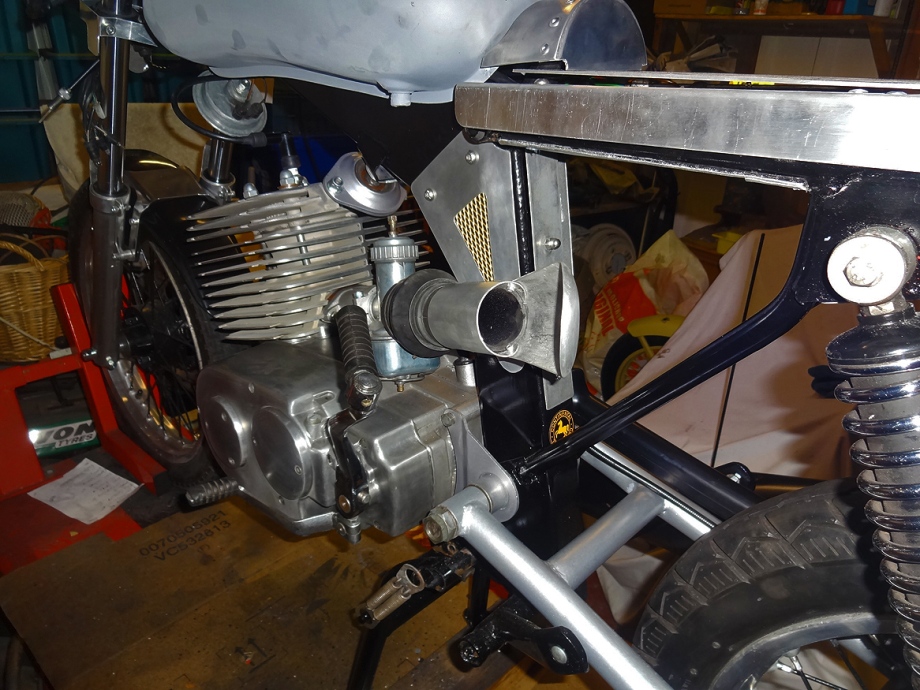
I also decided to cut down the cylinder head to the same spec as the race series bikes, to save weight, and give more “special” looks 🙂
It was a huge job, but after many hours of cutting and polishing, the results pleased me …..


Again, during this time, the rest of the parts were stripped and polished, many happy hours were spent doing this, mainly whilst drinking and watching TV 🙂


So…..ongoing work involved getting the cylinder and head of the engine sand-blasted back to factory finish, nice and clean 🙂

New kickstart fitted.
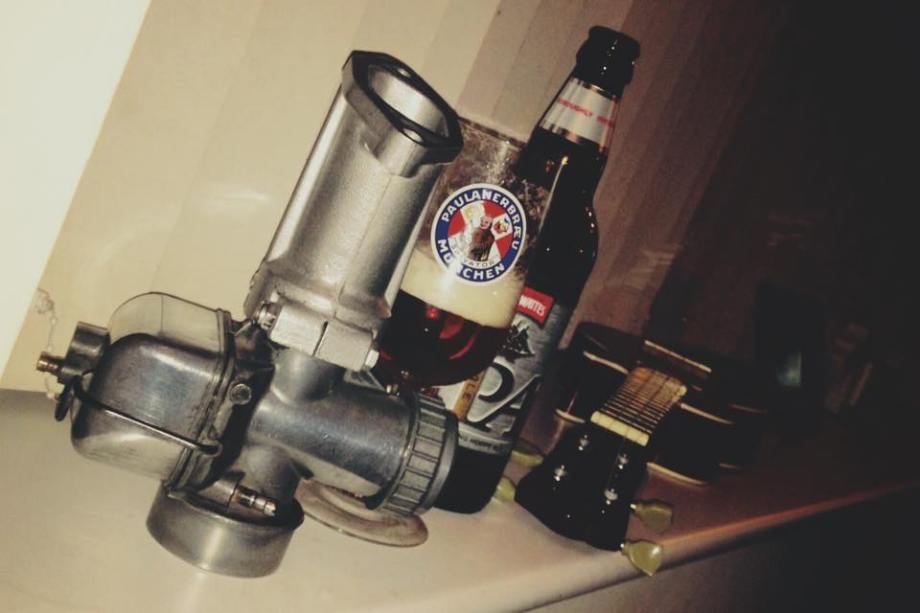
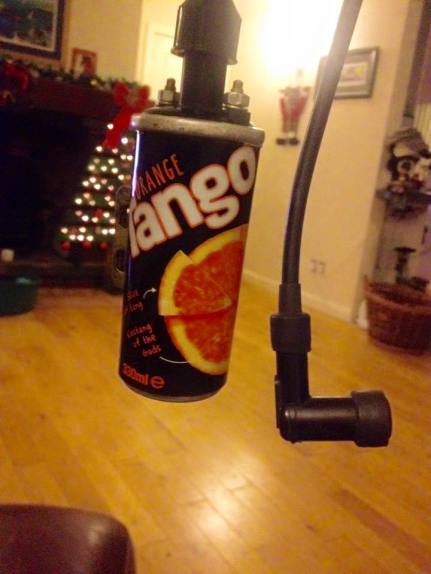
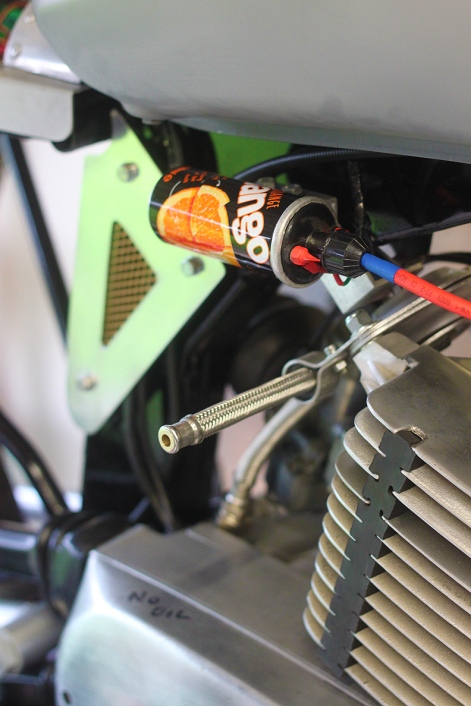
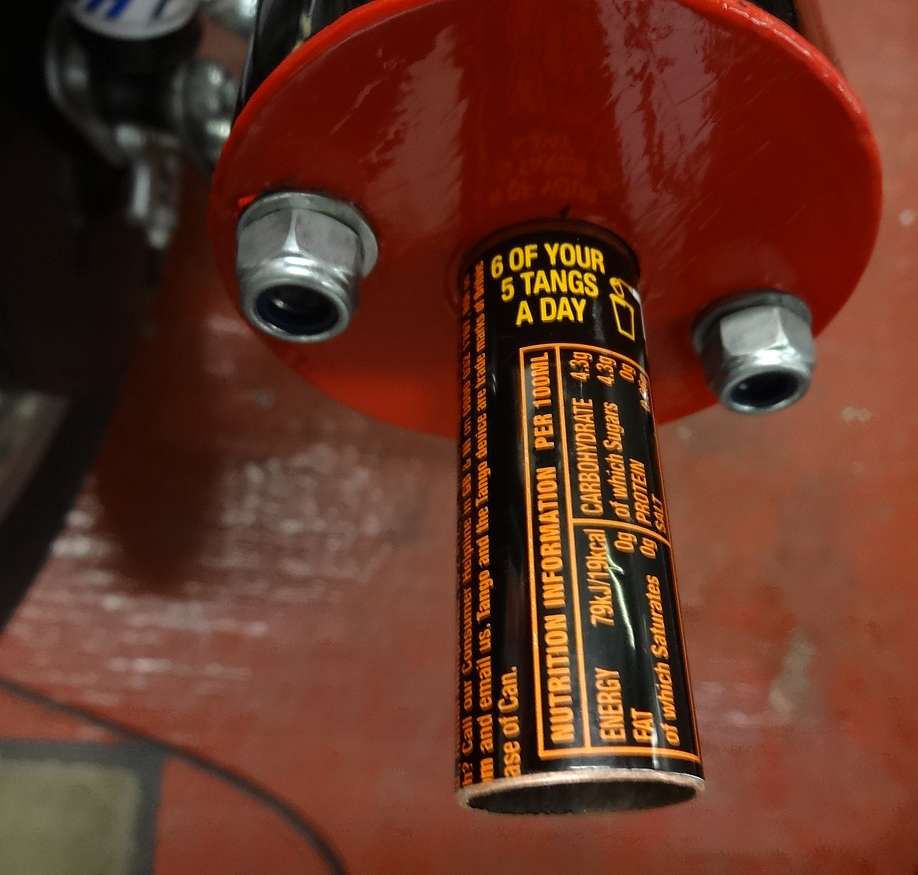
…..that can of Tango gave me an idea of a theme 😉 more to follow !!

So, back to assembly and design …..
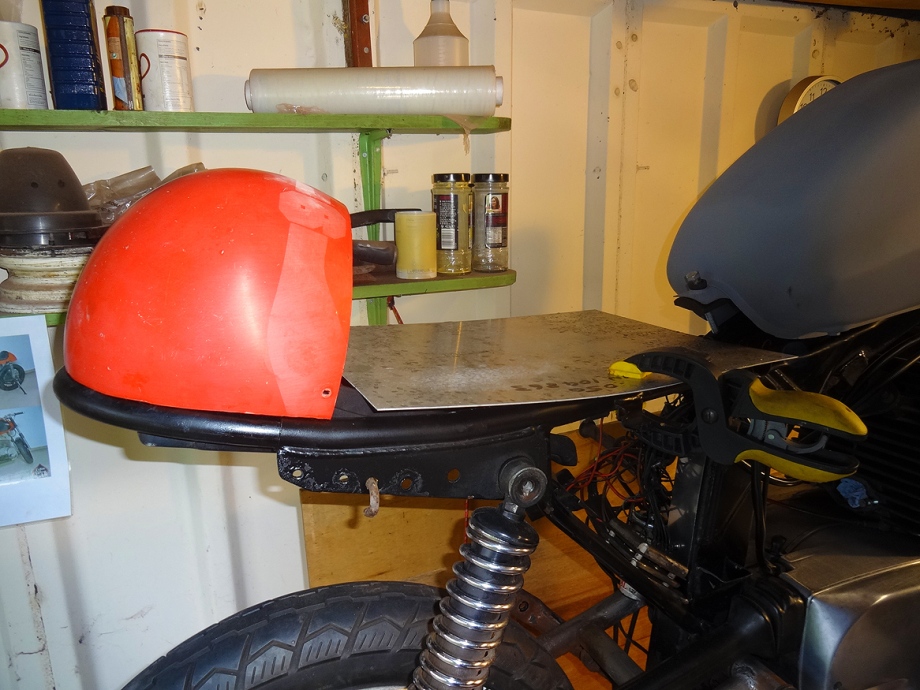
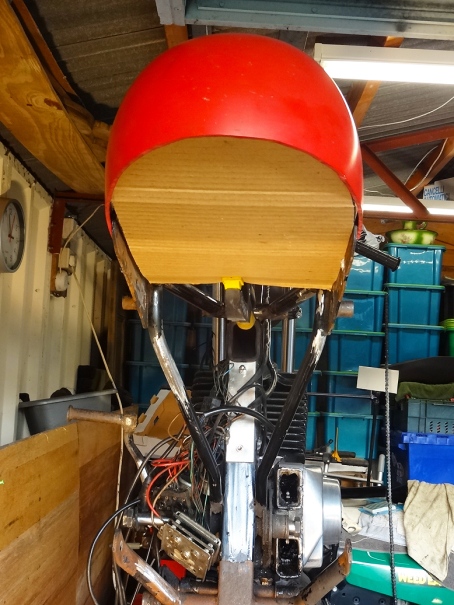
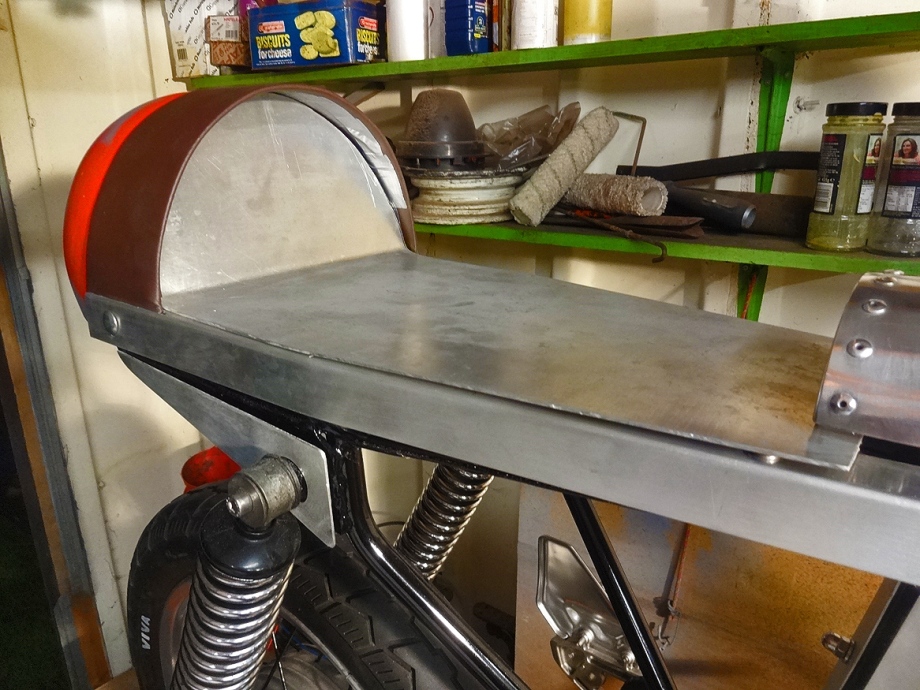
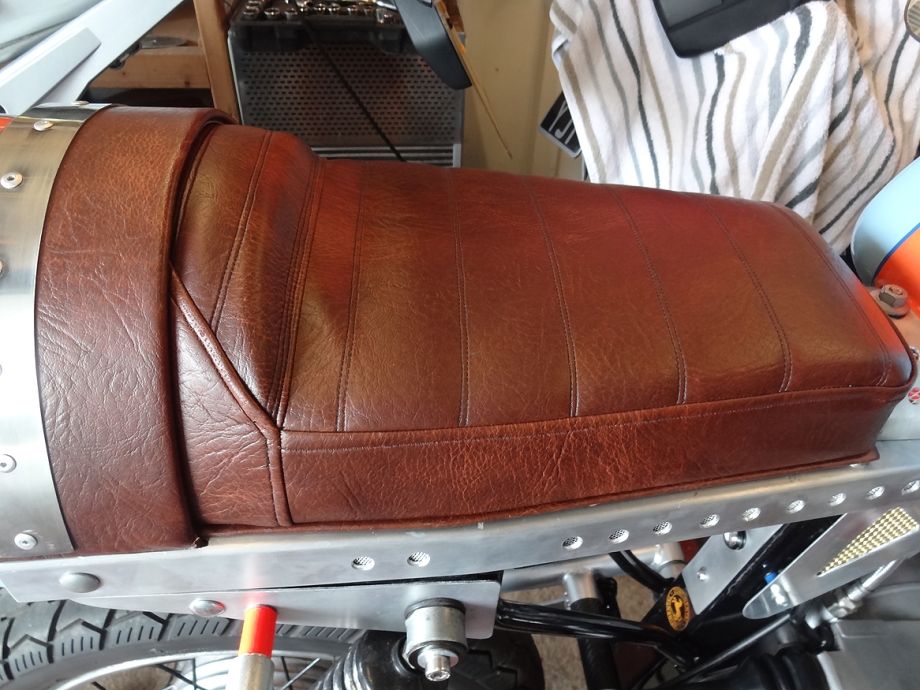
Now we needed a seat. I always liked the look of the Honda late 1960’s racer style, and when it came to cafe racer design, I wanted a similar look ….
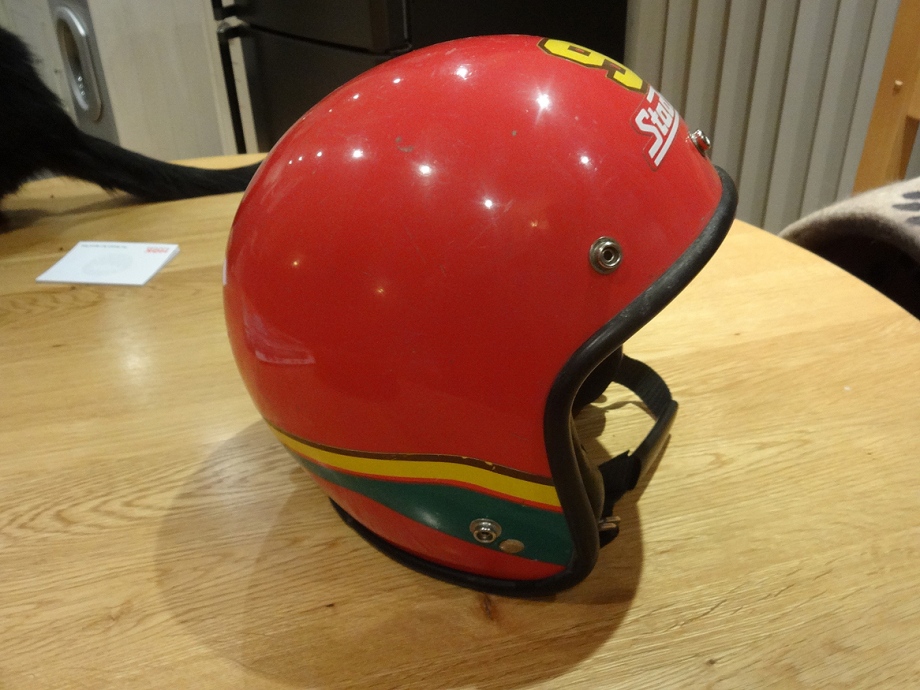
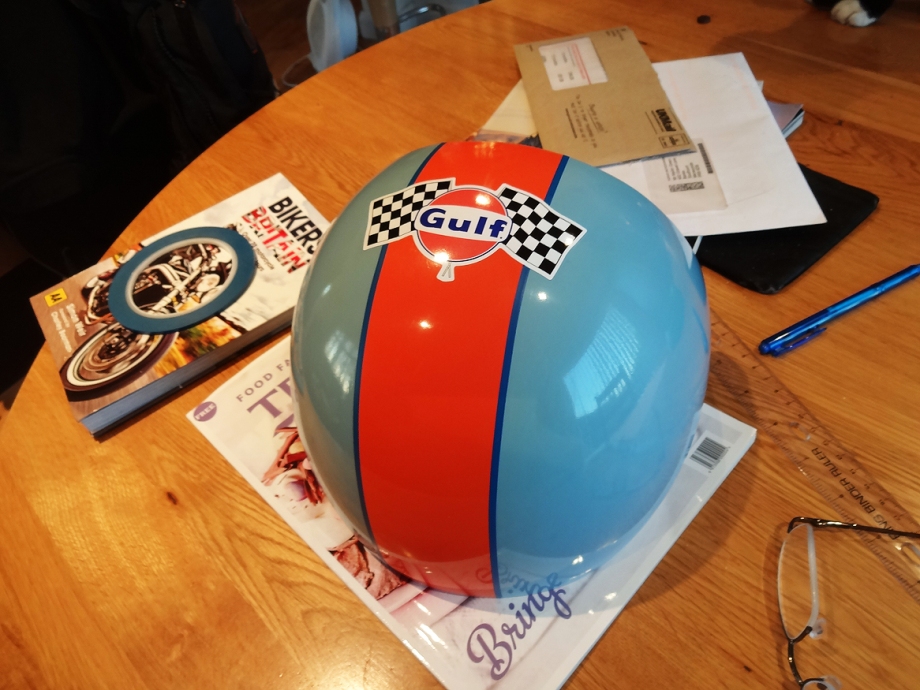
…….Last summer at a local car boot sale, I bought (£2) a small Stadium 1960’s helmet, I knew one day it would become useful for something 😉 …….

Retro wall art intact…. the rest became surplus 😉
…..development continued


Lines were improving ……

The battery got a new home ……

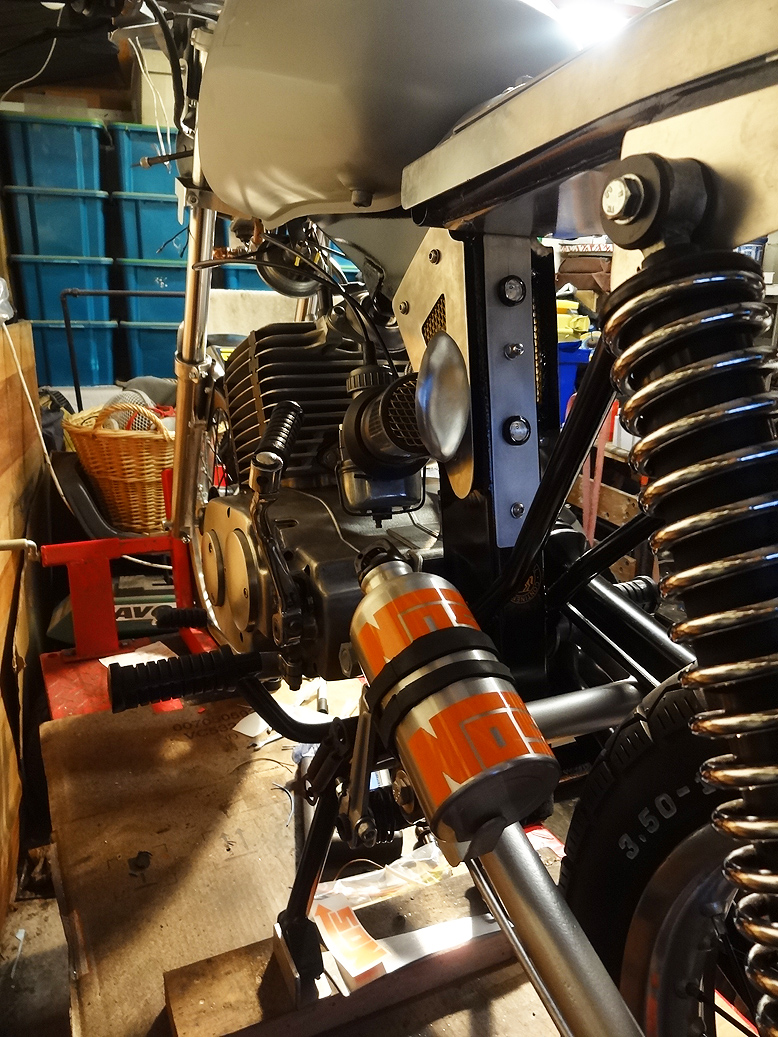
Alloy frame side panels and rear frame plates (meshed of course) were designed and made …..

Throttle casing repaired and improved

Seat base unit designed and made ……


Tank / seat holding pod hand made (took far too long but looks ok) 🙂

Battery and reg /rectifier was a tight fit but managed to JUST fit it in 🙂
Under tray made…… alloy plate …..


Spot that TANGO can 😉 High Voltage 😉 Hint 🙂
Ongoing parts refurb ………


And to the front, I made a bottom yoke alloy frame casing to incorporate indicator brackets ……
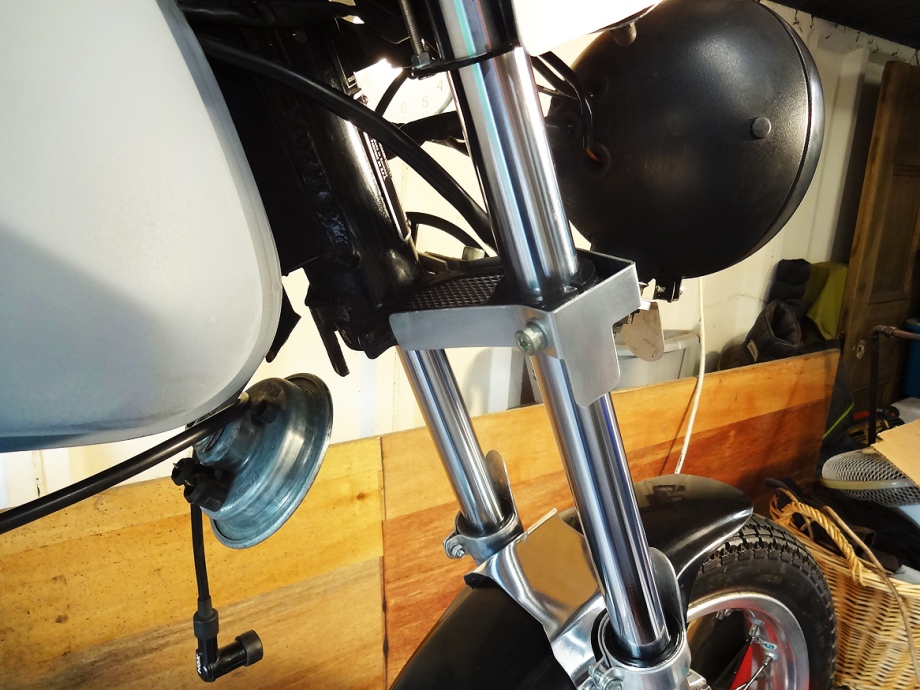
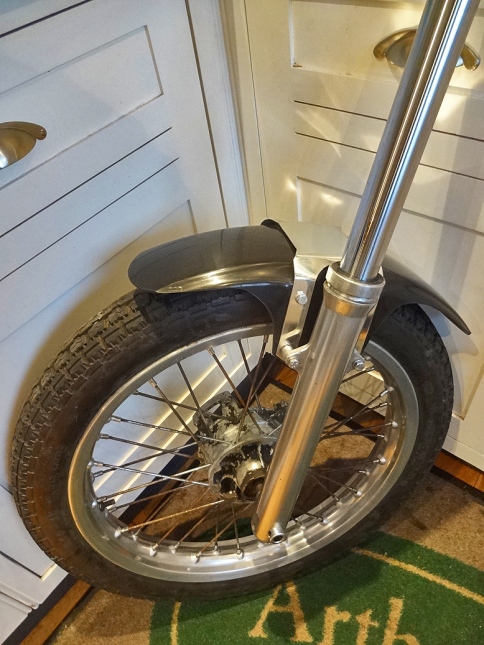
….and made a front fork alloy brace ….. and cut standard mudguard down to race size ….
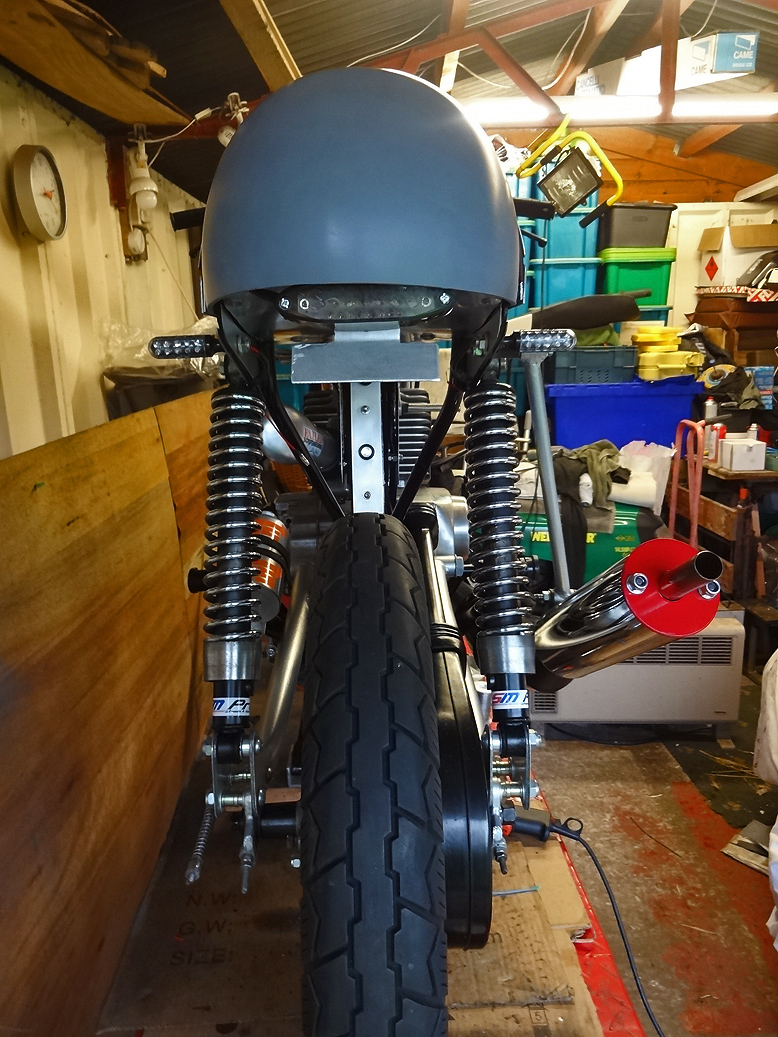
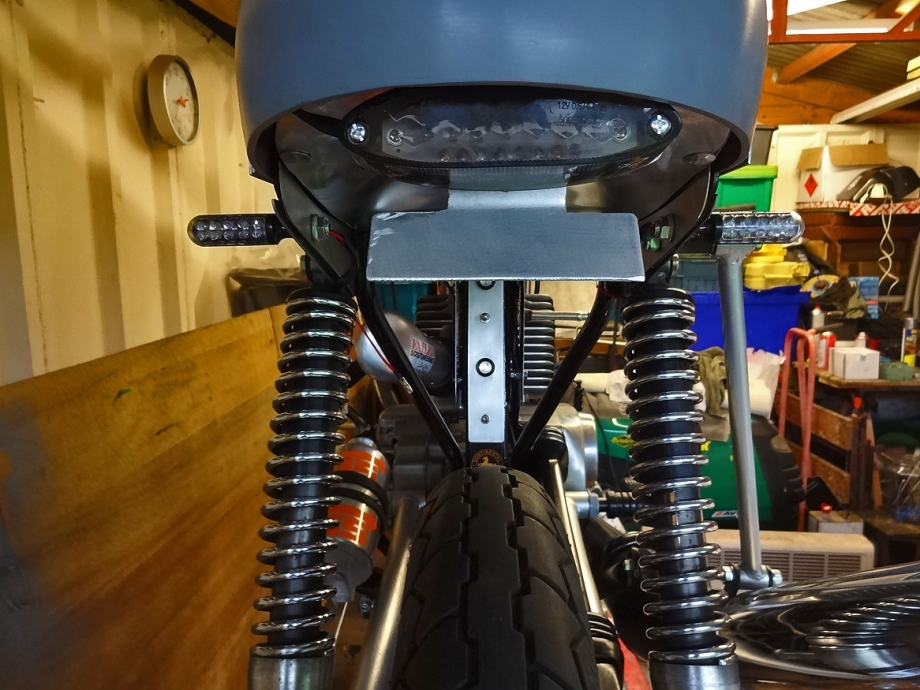
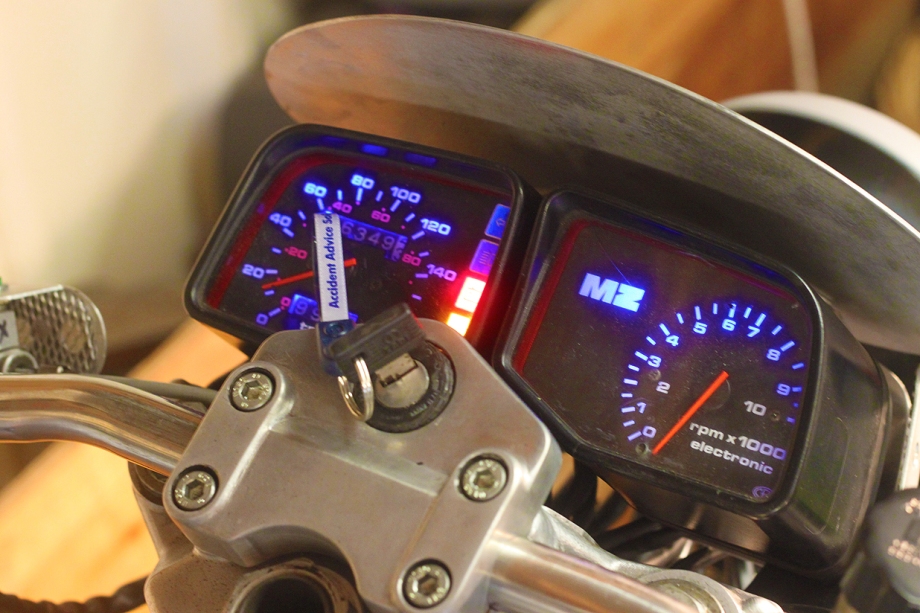
Made a bracket kit to lower the clocks down by 70mm to match new headlight level ….

Alloy race plate made, along with base and mounting plate below speedo / rev console ….
Made front fork guards, hand formed from flat alloy
Eagle eye LED brake lights fitted in rear frame

And LED rear light fitted to made number plate mounting bracket ….

Intake scoop hand formed from flat alloy sheet, using a hammer, and lots of hours 🙂

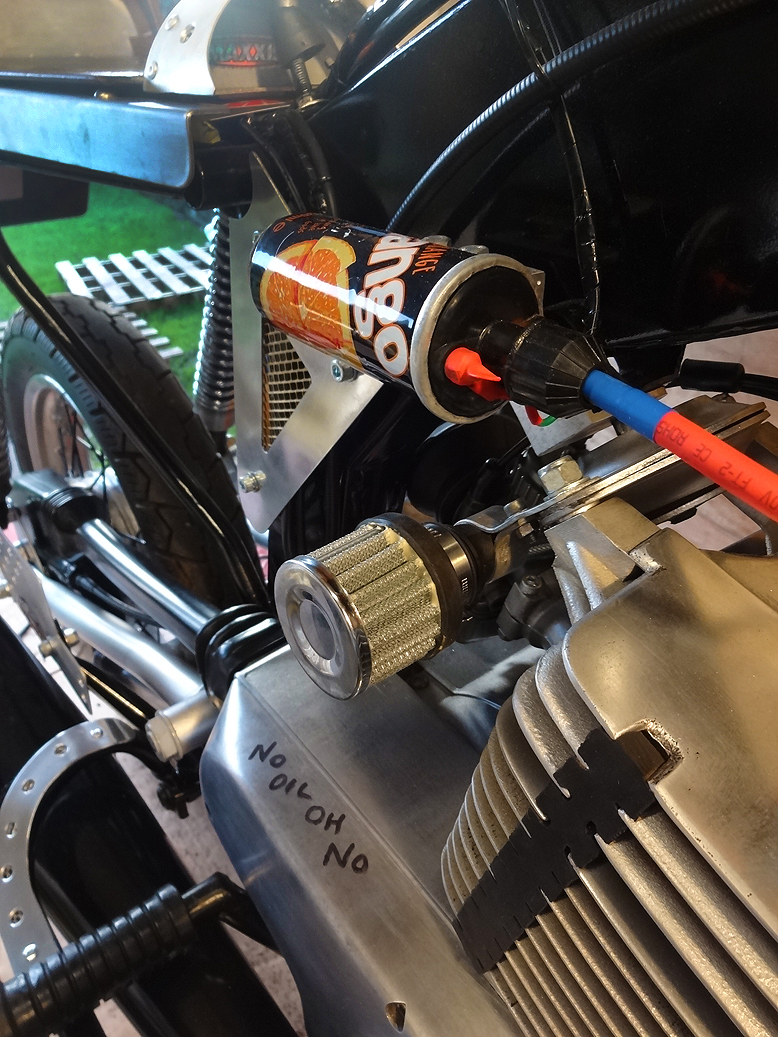
Engine breather – braided, filter to follow …..

Rear seat unit, nearly finished, upholstery to follow …….

RH handle bar alloy switch gear made …….

LH

“steam punk” copper / LED daytime lights made and fitted


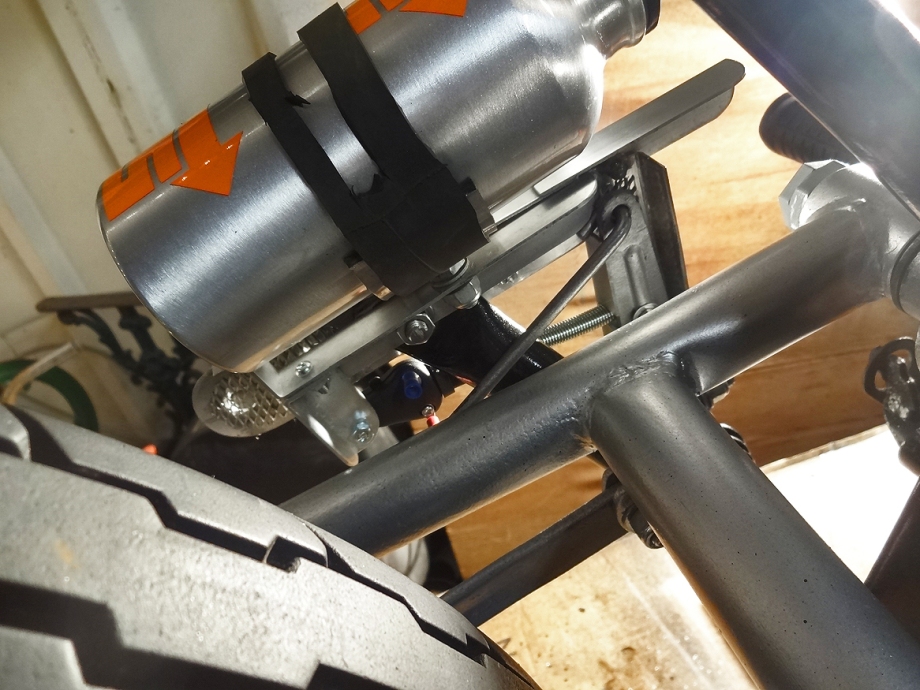
Mounting bracket made today for my 2-stroke oil “NOS” bottle 🙂
New 28″ cafe racer “drag bars” received and fitted today, great position and looks….Happy 🙂

Seat unit finally finished, I previously made the alloy seat base to fit the bike , then made a slightly smaller plywood liner which is bolted to the alloy base, this liner will now be upholstered.

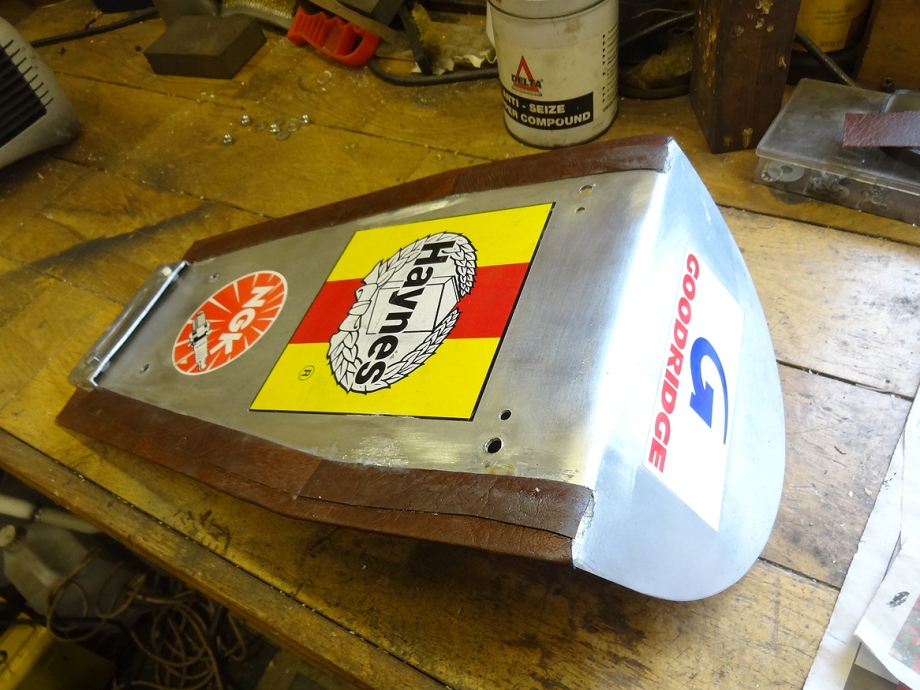
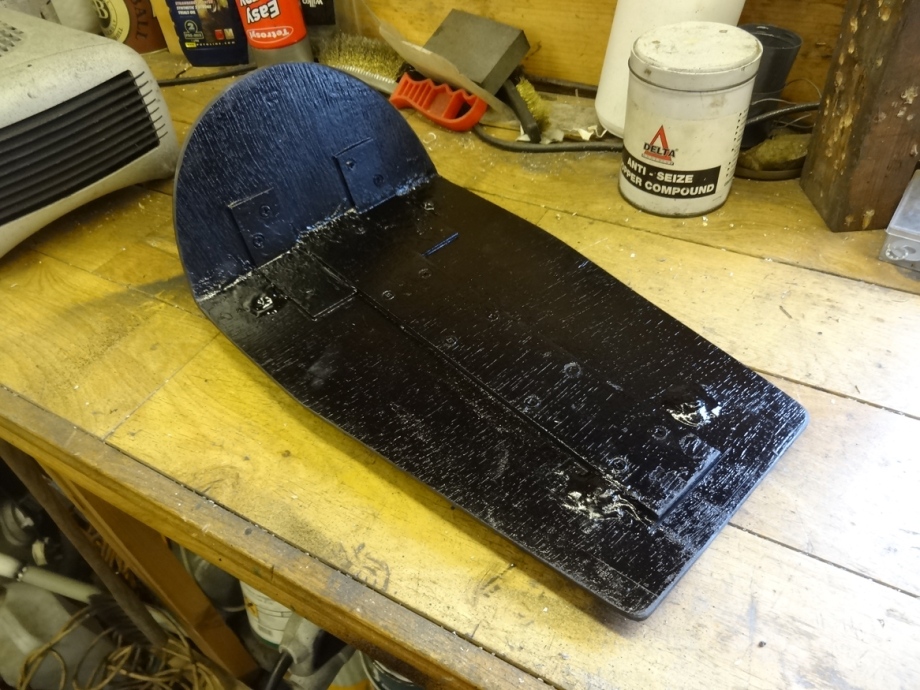
The seat unit and fuel tank are both held in place by my riveted pod which mounts on the tank bolt, then locates into a retaining slot in the seat base. One nut holds all 🙂
Fits perfectly 😉


LED indicators now fitted, but need a resistor flasher unit to complete.

Today I managed to get hold of that special book from the library 🙂 Looking forward to learning the history.
Next jobs …….
Having removed a lot of the original equipment, I needed a new rear stop lamp switch…. Ebay to the rescue ….
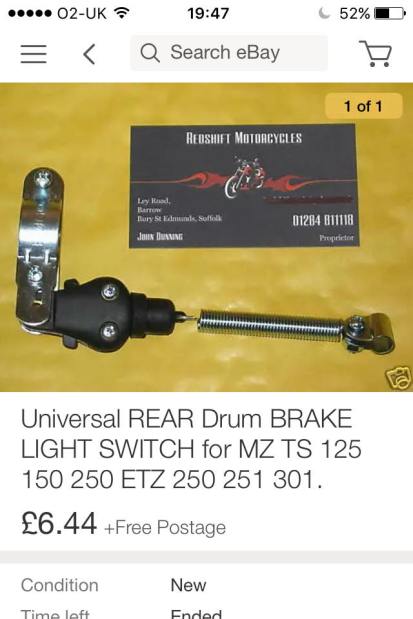
I had removed the mountings for the old switch from the frame, so decided to invent a new mounting on the other side of the bike.
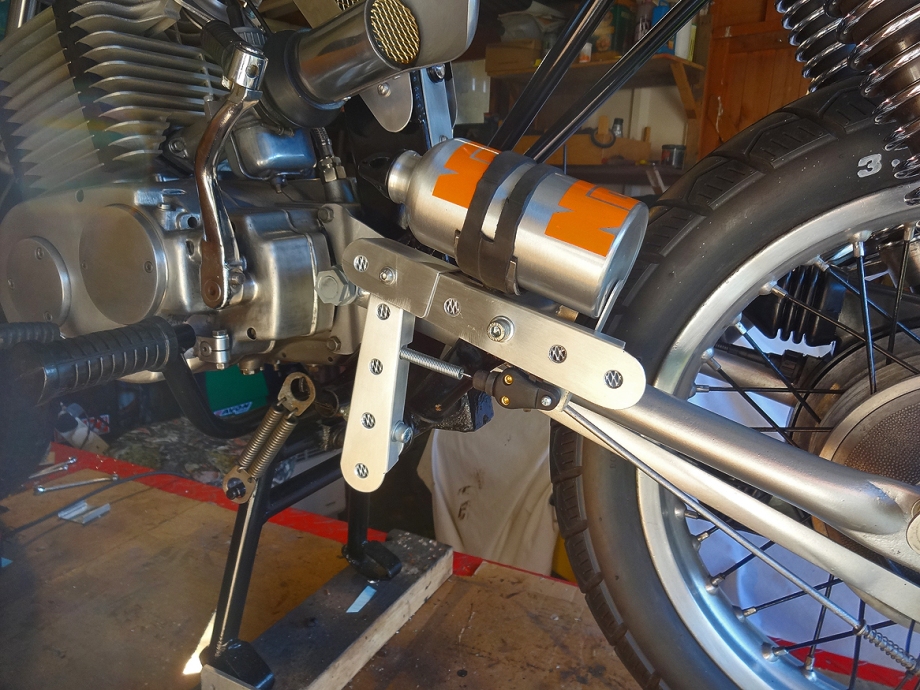
The original brake arm pivot lever is quite ugly and agricultural looking, so I made a complete alloy casing for the whole brake mechanism which includes the switch mount.
Looks trick, works perfectly … Happy 🙂


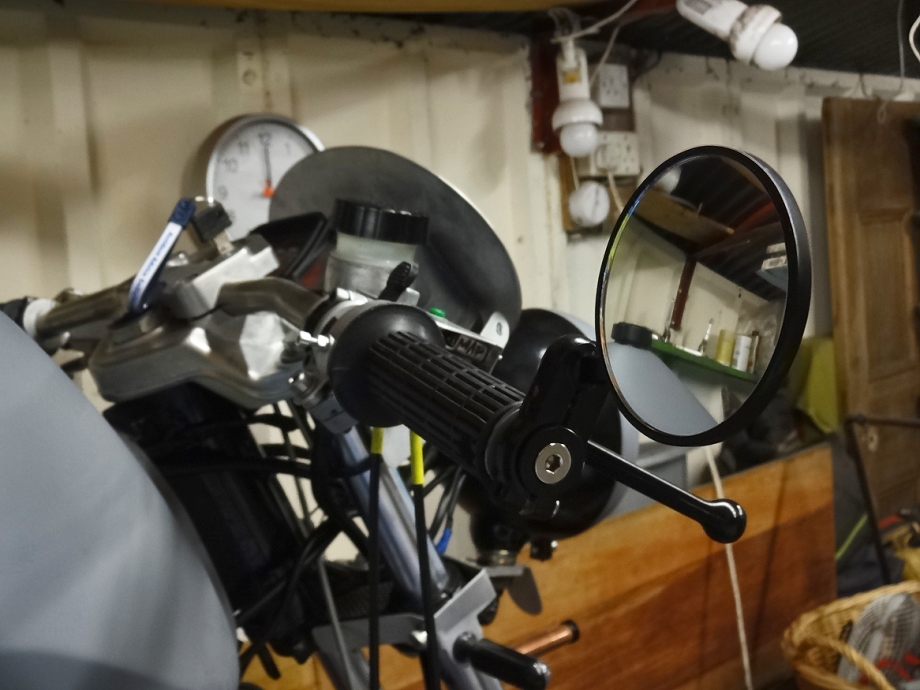
The postman just brought my nice new bar end mirrors 🙂 Ace

Blue LED’s fitted in the pods ……
A bit more alloy fabrication on the RHS
Heel plate and brake lever shield 🙂


By raising the rear suspension mounts meant that the bike now sits higher off the ground, rendering the centre stand pretty useless 😦
My answer …. High heels 🙂 Sorted !!!!! I may in the future cut and rebuild the stand, but this works perfectly for now ….
A few more jobs still need to be done, seat unit, paint etc, but it’s time to wheel her out into the big wide world for the first time since entering my man cave back in November 🙂
No colour shots yet, saving the final looks til last 😉


Gearbox breather filter arrived today, fits nicely 🙂

Under seat unit now sorted, everything crammed in tightly, but fits and works.!!


Brake caliper cover made / drilled / meshed

Out on the lane, first run out in the real world ……. sweet as a nut 😀
Next job …… front and rear Crash Bobbins …. 🙂
Just like the racers …..


A bit more research into the technical side of 2 stroke technology … and a few adjustments …
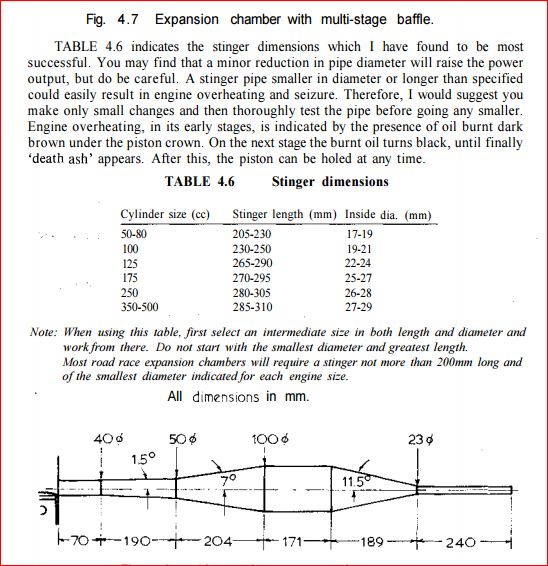
After messing about with intake and exhaust dimensions, she now revs out cleanly 🙂
There was only one number I could decide on 😀

A bit more obsessive “mesh technology” 😀

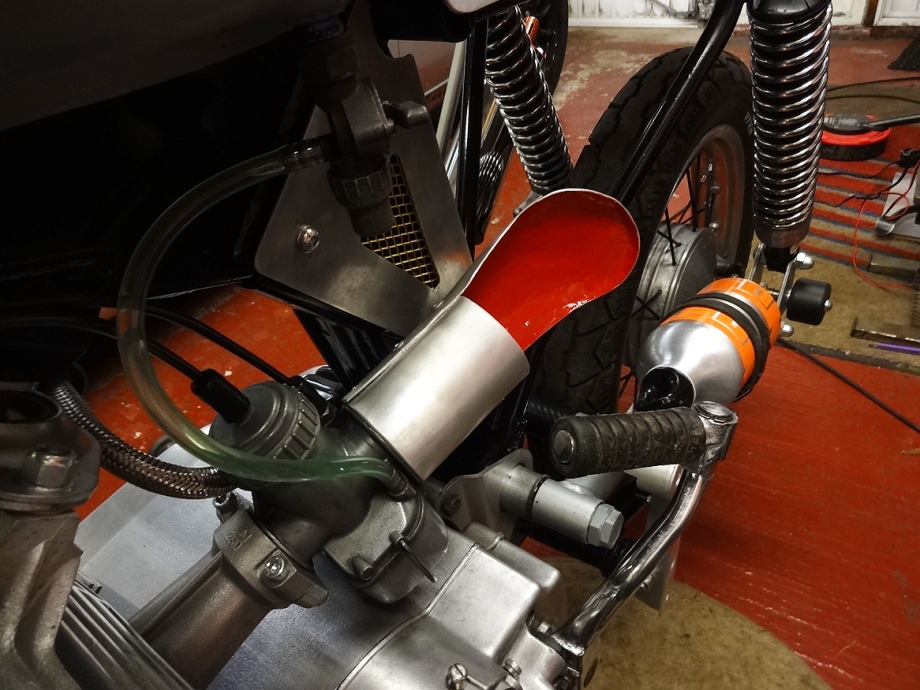
Titanium exhaust wrap arrived, pleased with the result …..

6 of your 5 Tangs a Day !!!! :O
Latest fantastical fabrication …. “Winglets” , as seen on MotoGP bikes …… a vain attempt to keep the front wheel on the road 😉 completely nuts 😀


Launch Control – Wheelie Control – Traction Control 😛 Bonkers 😀

Map #1 – Map #2 …… OS Lake district North West and North East 😀

Still undecided on a colour scheme …… sleeping on it 🙂
Tidied the wiring a bit …..

OK, I decided on a colour scheme 🙂 Here’s a clue 😉

After a lot of hard work by my next door neighbour Fiona, my seat cover is now finished, she has made a fantastic job of it 🙂
So now you have guessed the colour scheme, here is my amateur “back garden” paint job 😀
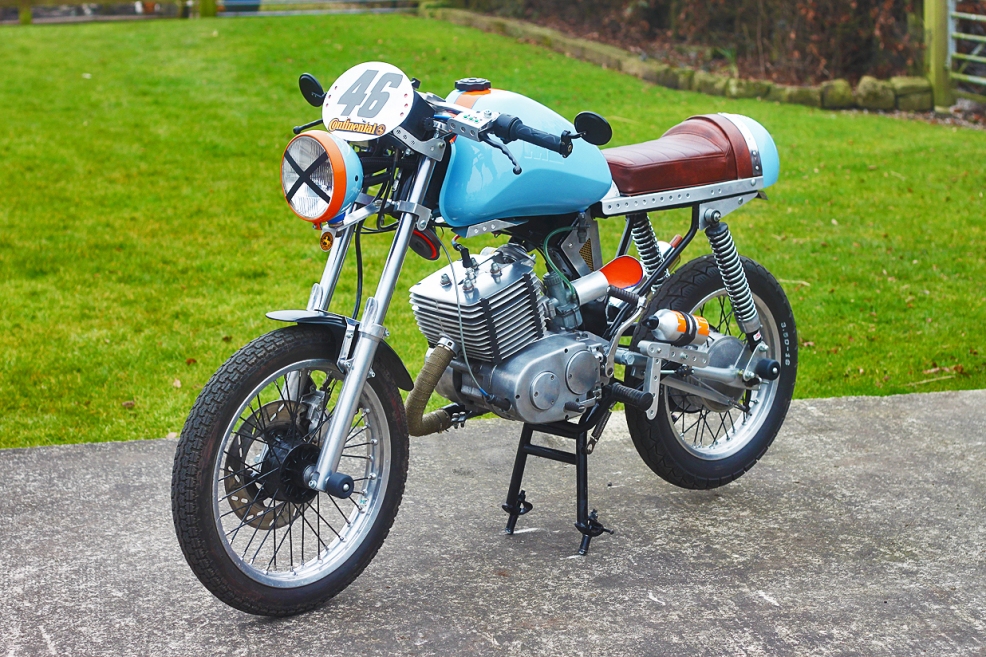
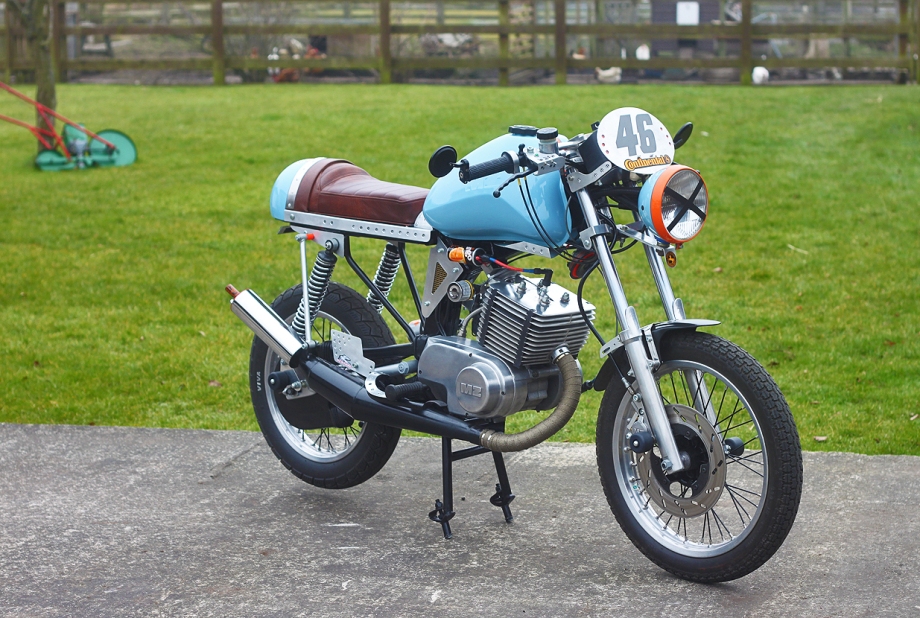
The colours are obviously the iconic 1970’s Gulf Racing scheme. I got the original 1972 Porsche Blue and Orange mixed at a local paint shop.

Base coat

2K lacquered and ready to harden overnight , then ready to fit.

OK, so this morning I fitted the shiny bits to the bike ….. the end is nigh 😦
I am now giving the bike a final polish, and will go and take a few pictures of the final result ….. back soon, watch this space !!
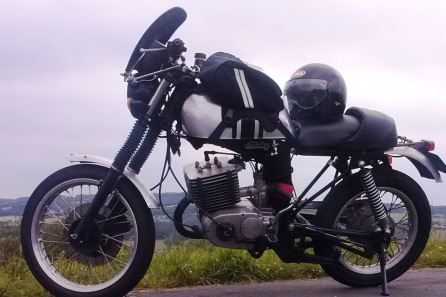
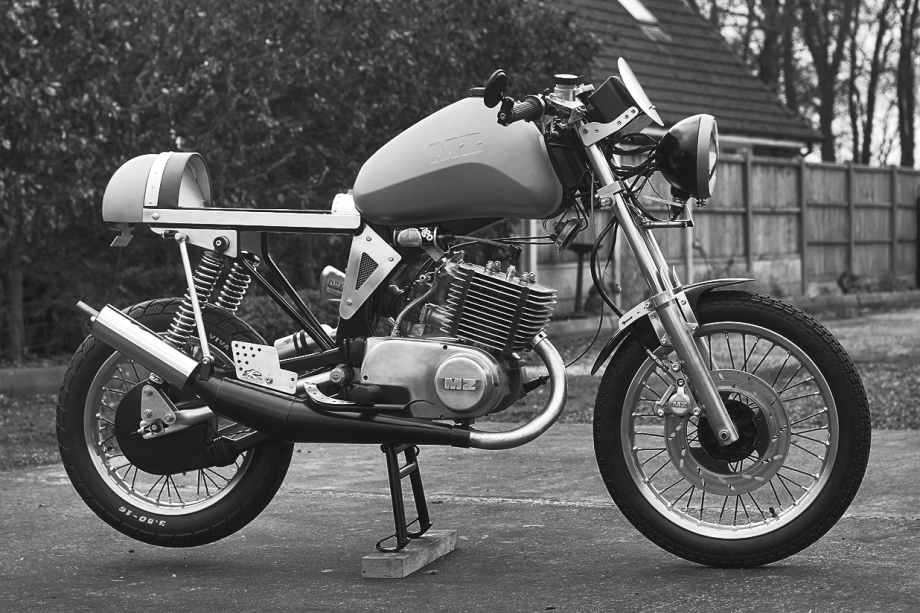
Well, here she is, just about finished. Pictures taken on a cold hazy March morning.
A bit of a transformation, far too many hours spent on her, but she got me through the miserable winter, I’m now looking forward to a few sunny Summer ride outs !!


Thanks for reading this, I hope I haven’t bored too many people along the way……
Nothing quite like a quirky little 25 year old MZ to get you through Winter !!
🙂
More pics will no doubt appear here when the sun comes out 🙂
……..Now onto the next one, but that’s a story for another day 😉
Cheers
Martin
